Last updated on May 30th, 2023 by Jules Winnfield
The world of coffee is a large one, and if you’re unfamiliar with the ins-and-outs of coffee drinking it can be pretty overwhelming. Even the basics, like making a shot of espresso, can be pretty confusing when you first start out.
Luckily, we’ve got you covered! This handy guide will take you through everything you need to know about how to use an espresso machine. We’ll take a look at each step from beans to coffee, as well as going over what makes an espresso machine so great in the first place.
Ready to start making the perfect espresso shots? Then let’s get right into it!
Why You Should Use An Espresso Machine
Making the perfect espresso is a fine and precise art, as well as a lot of effort. There’s alot of variables to consider to pull the perfect espresso shot like output yield, brew ratios, extraction times, pressure, temperature, pre-infusion, and more.
Espresso machines save you time and energy by simplifying and automating the complex process of brewing a high quality espresso.

Unlike coffee machines, an espresso machine is specialized for making shots of espresso. At the base level, an espresso machine will use high pressure and hot water to press your coffee beans and produce a delicious extraction full of flavor notes and aroma.
More complex machines (automatic, fully automatic, super automatic, coffee and espresso combos) can do even more like grind, tamp, pre-infuse, brew, and froth milk for you all with the press of a button!
What Makes Espresso Different?
You might be asking yourself: “So why is espresso so special? It’s just coffee, right?”.
Wrong (but we’re glad you asked!).
Coffee is made from pouring water through ground up coffee beans. If you force the water through the coffee grounds with increased pressure, it results in a better taste (just as long as it doesn’t face too much pressure). This is an espresso.
Because espresso beans are finer than regular ground coffee beans, you can get more tightly-packed granules. This combo of finer grounds with high pressure gives espresso a strong and rich flavor with crema, more complex than normal coffee and amazing if done correctly.
The process of making an espresso is pretty precise and needs the right amount of pressure, heat, and time to do right. So, an espresso machine makes this much simpler and less time-consuming, so you can enjoy great coffee in no time.
There are also other ways to brew espresso (like with a French press) without an espresso machine, albeit without pressure so the taste is a little different. Buts its an option.
Using An Espresso Machine

With all that being said and done, now we can get started on how to use an espresso maker! Here’s our step-by-step guide.
Step 1: Prepare the Espresso Machine
- First, you’re going to want to switch on your espresso machine.
Having the water at the right temperature is a baseline for good coffee, and some espresso machines take up to half an hour to fully warm up. Switch on the power to get things going.
- While the machine is heating up, fill the reservoir with water.
Because the water is going to be heated, tap water should be fine. You can also use filtered water if you’d prefer, although many machines have a water filter built into them.
Many espresso makers have marking on their reservoirs to indicate the size cup of espresso it will provide (eg. a double shot or triple shot). Make sure you fill the water up to the correct line depending on how much coffee you want.
- Bonus Tip
If you want to hurry things along a bit, you can pull a shot of hot water. Just put your portable filter (or portafilter) into the espresso machine without any espresso grounds and pull the water through.
Pulling a shot of hot water (also known as a blank shot) will warm the machine up more quickly, as well as heating your cup up.
Espresso, like all coffee, needs a specific heat to brew properly. According to the SCA standards for espresso, the ideal brewing temperature for espresso is between 195℉ to 205℉, so make sure your water is hot enough before you start pouring.
Step 2: Prepare Your Coffee Beans
Now it’s time to get started with grinding your beans.
- First, measure out your beans in a coffee scale.
A standard double shot of espresso will need around 18-20 grams of beans depending on the brand and size of the beans you’re using.
- From there, grind your coffee beans into fine granules.
Some espresso machines (the super automatic type) have a built in grinder that you can set to fine and let it do the work for you. However, you can grind your beans manually and still get great results. Takes more time, but it’s also more affordable.
If you’re using a grinder separate from your machine, you should be looking for fine grounds around the size of granules of sugar. Don’t stress too much about how perfect your coffee grounds are – this can be tweaked to perfection when you’re dialing in your shots.
Alternatively, you can just use pre-ground coffee or espresso granules to save time and effort.
- With your beans ground, you need to fill your portafilter.
Using a spoon or a scoop, fill the portafilter with a small mountain of grounds. Don’t worry about overfilling the portafilter, as you’ll be sorting that out straight away.
Using the spoon handle or a finger (we’ve found that a pinky finger works best), level off the excess coffee on the top of the portafilter. Catch the excess coffee in a bowl or back in the grinder container, as you can reuse these in a later cup.
Press down on the grounds lightly to compress them a bit in the portafilter. Smooth down and spread the ground around, making sure that you’re filling every little gap. Once you’re done, give the side of your portafilter a gentle tap to make sure the grounds aren’t shifting inside.
Step 3: Tamp the Beans

Photo by David Lundgren
- Now, you need to tamper your coffee grounds.
A tamper is a flat-faced tool used to press down on your espresso grounds to get them as tight as possible.
The espresso brewing process involves water being forced through the grounds so having properly pressed (or pucked) grounds will give you the best espresso shot.
- Start off by using a tamp to gently press down on the grounds.
Try to keep the tamper as straight as possible – an uneven puck can negatively affect your espresso. Press lightly to start off with so you can line up the tamper correctly.
- With everything lined up, push the tamper straight down onto the grounds.
Supposedly, the correct amount of force to use is 30 lbs, but that seems to be a bit much and it’s hard to measure.
That said, you should still use a fair amount of pressure. You want to compress the coffee so the water is forced through it properly, so don’t go easy here.
You want to evenly distribute the pressure across the whole portafilter, so avoid tilting the tamper – even a slight angle can mess up the tamping process.
- Once you’re done, give the tamper a spin or a twist as you take it off the portafilter.
This will prevent any granules from sticking to the bottom of the tamper and leave you with a smooth puck.
You should also wipe away any excess grounds clinging to the side or top of the portafilter to make sure it’s clean.
Step 4: Pull And Dial In Your Shot
Now you’re ready to pull your first shot of espresso!
- Put your portafilter into the slot on your espresso machine and make sure it locks into place.
You should hear a click or feel some resistance when it locks in.
Some commercial espresso machines won’t let you start the water unless the filter is securely in place, but you should still give it a small wiggle to make sure before you begin.
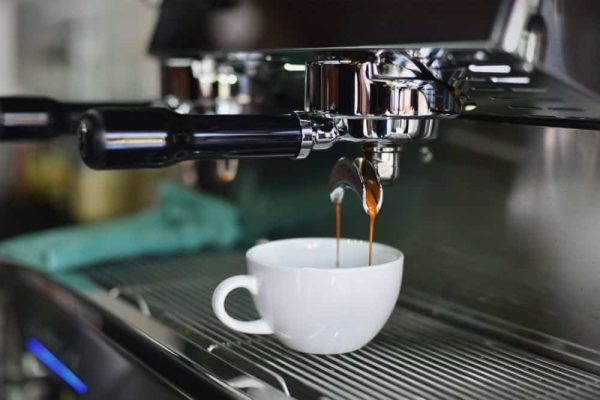
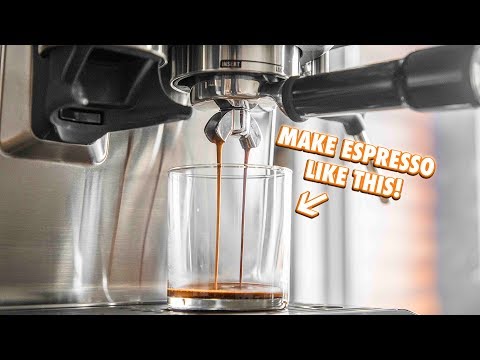
- Now start pulling the water through the grounds.
This should take between 25-30 seconds for a double shot with freshly tampered grounds. If you are using a semi automatic, you will have to keep count.
If the water seems to be taking too long to come through (or is coming through too quickly), you may need to adjust the grind size of your beans.
When the brew starts to come in light or you’ve hit the time mark, stop your pull. You should expect a yield of about 1:2. In other words, for every 20 grams of coffee beans used, you get 40 grams of espresso out. Congratulations – you’ve just pulled your first shot of espresso!
- With that milestone down, it’s time to start dialing in the flavor. Start with the pressure.
Some high quality espresso makers come with a built-in pressure gauge that will indicate whether you had too much or too little pressure, letting you know if you need to change your grind profile. But if you don’t have a pressure gauge, you’ll need to play it by ear (or tongue, in this case).
If your espresso tastes bitter, that means that the coffee is over-extracted and your beans need a coarser grind.
If your espresso is sour, then your coffee grounds are too coarse and the coffee was under-extracted.
The average pressure most baristas use for espresso preparation is 8.5 bars, so thats a good place to start.
- Dial in your grind profile next
You should consider a few things about your espresso beans before you start tweaking the coarseness and grind profile. Different beans have different optimum grind sizes, with a couple of factors affecting this.
Beans with a dark roast will already have a more rich and slightly bitter flavor, so you should give these a more coarse grind to prevent your espresso from tasting too bitter. Older beans may need a finer grind to get the most flavor out of them.
You should toss out the old coffee grounds every time you adjust the coarseness to prevent the previous taste from coming through. Keep testing with different grind sizes until you hit that sweet spot.
When you’ve gotten the pressure and grind profile dialed in, you’re in business and can continue pulling shots. A good tip to keep in mind is to write down the measurements you used for next time, so you can cut down on the dialing-in stage.
Step 5: Froth and Heat Milk
The traditional Italian style of drinking espresso is black with nothing added, so you can enjoy the pure layers of flavor.
But straight espresso isn’t to everyone’s tastes, and adding some frothed and steamed milk will transform your espresso shot into a delicious milky coffee. Here’s how.

- First, fill a stainless steel milk pitcher with some cold milk.
Most espresso machines have a steamer wand included, but if your machine doesn’t you can use a separate steamer with no issues.
- Before you start frothing your milk, turn on the steamer wand for a few seconds to get rid of any condensation built up inside.
- Next, dip the steamer a little bit below the milk’s surface and turn it on.
This is to start frothing the milk. Move the steamer wand around in a whisking motion near the surface of the milk to froth it. Keep on going until the milk is the consistency you want.
- Now, submerge the steamer wand in the milk and let it heat up.
Push the steamer to the bottom of the milk jug, in the middle so the milk heats up evenly. When it hits the right temperature, you’ve got yourself some perfectly steamed milk.
If you want to keep the froth as long as possible, your milk should be heated to between 130℉ and 150℉; this will keep your milk hot while maintaining the integrity of your foam
Now that you’ve steamed and frothed your milk, you can add it to your favorite mug alongside your espresso shot. Create a delicious latte, cappuccino, or macchiato to relax to with some latte art if you’re feeling creative!
Final Thoughts
So now you know a little more about how to use an espresso machine, as well as all the stages you need to follow to make the perfect shot of espresso. Not only that, but we’ve covered how to froth and steam milk to add to your espresso to make a variety of delicious coffee drinks.
While using an espresso machine can be daunting at first, anybody can easily learn to pull nice shots like a barista. All it takes is practice.
Commit to brewing at least 2-3 time per week. The process will quickly become a lot less complicated and you will crank out rich tasty shots of espresso every time.
Start with well known brands like Breville or De’Longhi and you’ll be on your way.
We hope you’ve had fun looking a bit closer into the ins-and-outs of using an espresso machine. All that’s left for you to do now is get started on making some coffee.
Enjoy!
FAQ
Is it hard to use an espresso machine?
While espresso machines can seem intimidating, they are actually fairly simple to use. Manual and semi-automatic espresso machines may require more effort, while more high end machines can be complex in functionality but simpler to use because of their one button operation.
But in general, what makes an espresso machine difficult to use is mostly the process of pulling an espresso itself. And while it is complex and a bit frustrating in the beginning, with practice you can get pretty good at it.
Can I use pre ground coffee for espresso?
You can use pre ground coffee for brewing an espresso but it may not be as flavorful and nuanced as freshly ground coffee beans.
Coffee Has Never Read This Good!
Sign up for a FREE newsletter to the best home brewing tips and guides
Thank you for subscribing to The Cup Coffee House Crew! There's a surprise in your Inbox 🙂
Something went wrong.
- About the Author
- Latest Posts

“Jules” is a pharmacist by day and investor, writer, and health nut by night. When he’s not sipping on some coffee laced with MCT oil during an 18 hour fast, he is writing about how to get your coffee grind on or playing Monopoly with his 2 boys and wife. Ahh…life is good!