Last updated on October 30th, 2023 by Jules Winnfield

A Keurig is a single brew coffee maker that’s designed to be convenient and easy to use to get a quick cup of hot coffee.
But while the process of actually making coffee with your Keurig is a simple one, there are few other important things to understand about how to use a Keurig: how to set it up initially, automatic modes (which is only available on certain Keurig models), maintenance, draining the machine’s internal water tank, as well as alternatives to Keurig if it doesn’t seem like the right coffee maker for you.
This will help you not only get the best cup of coffee your Keurig will make, but also keep your Keurig lasting longer and serving you well.
So we put together this quick beginners guide to help you, including answers to a range of frequently asked questions regarding Keurig and coffee machines in general. So whether you have trouble shooting questions about your Keurig or you just want to get started right, this guide should help!
So, what’s first?
- Setting Up Your Keurig Coffee Maker
- How To Use A Keurig: From Coffee Pod To The Perfect Cup Of Coffee
- Maintaining Your Keurig Machine
- Keurig Auto-Brew and Auto-On
- How Will I Know Which Keurig Is Right For Me?
- Alternatives To Keurig
- Should I Get A Milk Frother?
- Frequently Asked Questions Regarding Keurig And Other Coffee Makers
- Final Thoughts: How To Use A Keurig
Setting Up Your Keurig Coffee Maker
It’s important to follow these steps when you first acquire a Keurig coffee maker. While the urge to improvise and just get brewing is great (trust me, I’m guilty of this too), you want to avoid doing that. If you don’t set up your Keurig properly, you could potentially end up breaking the machine or reducing its life span.
First, take your Keurig out of the box (an obvious step, sure, but we like to be thorough!). There tends to be adhesive tape that holds certain components of the Keurig together – remove this, then plug in the machine.

Beautiful isn’t it?!
Be sure to hold onto the user manual that came with the Keurig – this is where you’ll find notes about your specific model that we might not have mentioned in this article.
Although, again… we’re pretty thorough, so it’s probably here. Especially since most Keurig machines will work pretty much the same with slight differences. If you bought your Keurig preowned and there’s no user manual, you can head to the Keurig website to seek further assistance.
If your Keurig has a shipping disc, this will be located in the pod attachment. Lift the pod handle and remove the disc. While you won’t be needing the shipping disc for the brewing process, it’s best to keep it somewhere safe (along with the Keurig box and manual) in case you need to return the machine or you want to sell it.
Next, remove the water reservoir, unless your Keurig model is a K10, a K15, or a B31 Mini, in which case the water reservoir won’t be removable.

Wash your water reservoir with a sponge or a soft cloth, in warm or hot water with plenty of soap. Avoid washing the attachment with something that might scratch it, like a Brill-o pad. It’s important to wipe the water entry point, which is at the base of the water reservoir.
The majority of Keurig models come with a charcoal water filter, but if yours doesn’t then you can skip these steps (unless you want to just… imagine you’re rinsing a charcoal water filter, in which case… you do you!).
If your Keurig does have a charcoal water filter, rinse it under cool water for about a minute, so it soaks up as much water as it can.
Proceed to soak the filter in a bowl of water for about five minutes, before removing it from the bowl and massaging it until all of the loose charcoal fall out.
Next, put the charcoal water filter into the handle of the water filter and make sure it snaps into the water reservoir. Fill the water reservoir with tap water to the max fill line marked on the Keurig machine, but only if you have a charcoal water filter.
If you don’t have one, fill the water reservoir instead with filtered or spring water. Then press the power button and the Keurig brewer will begin to preheat. This process can take between 20 seconds to three minutes, depending on your Keurig model.
Grab a coffee mug and place it on the drip tray of your Keurig machine. Certain Keurig models have a sensor for detecting your mug, meaning the brew cycle won’t begin until the coffee mug is in place.
Lift the handle and lower it, without inserting a K cup pod. This is the cleansing brew process, so the K cup would just be wasted. Select the setting for the brew size that matches your mug size. Make sure you don’t choose a brew size that would be bigger than your cup size, or the liquid will end up spilling all over your drip tray.
The cleansing brew cycle will be complete within 30 seconds to three minutes. Once it’s done, the internal components of your Keurig will have been rinsed, and now you can use the machine for regular brewing.
How To Use A Keurig: From Coffee Pod To The Perfect Cup Of Coffee

The standard brew cycle for Keurig coffee machines is a simple process.
First, make sure that your Keurig is plugged in properly, and that it’s switched on. The power button can usually be found on the right side of the Keurig, up at the top.
Once the power button has been pushed, the Keurig will start heating, and you’ll hear a gurgling sound- this is just the heating sound. The machine will now be heating the water inside to 192 degrees Fahrenheit. Give the Keurig time to complete the heating process- it won’t take long.
I like to get this part started while I am still getting the kids and myself ready for work and school in the morning.
Fill up your water reservoir, which will usually hold several cups worth of coffee. The lid of the reservoir will be on the top left of the Keurig. The buzzing noise you might feel when lifting this lid is normal – it’s the Keurig transferring water into the heating chamber.
Next, choose which one of the specially designed coffee pods you’d like to brew. Don’t remove the foil lid from K cup pods – they’re supposed to stay on. Put the K cup pod in the pod holder at the front of the Keurig, which will be revealed once you lift up the handle at the front of the machine gently.

Use the same handle to close the chamber once you’ve inserted the K pod, and now your Keurig will be ready to start brewing. The machine will indicate this by displaying ‘Ready to brew’. If your model of Keurig doesn’t feature a display, the buttons on the right of the machine will blink.
Place your favorite mug on the tray, first ensuring that it’s the right size for your machine. If the cup fits on the tray, it’s probably the right size.
Some models allow you to choose your size of mug at this stage, at which point the coffee will start to brew. If there’s no option like this, simply press the brew button and the coffee will brew.
Once the brew cycle run has finished making coffee, open back up the coffee chamber and dispose of the coffee pod. This chamber should remain open between uses.
And voila! You have your perfect cup of coffee.
Maintaining Your Keurig Machine
We’ll get this out of the way first: never immerse your Keurig machine in water. This will damage the machine’s internal electrics. So how do you clean a Keurig?
It’s recommended that you clean out your Keurig at least every three to six months. This is done with either Keurig descaling solution or white vinegar. Your machine needs to be cleaned because mineral deposits build up within the Keurig over time.

It has SOOO many uses!
First, fill the water reservoir halfway with vinegar or with the descaling solution, and run brewing cycles until the water reservoir is empty. Next, repeat this process, but with plain water instead.
Use a damp cloth with soap to clean the outside of your Keurig. This should help to get rid of any grime and excess coffee residue. You can also clean your water reservoir by removing it from your Keurig and rinsing it.
When the drip tray gets full, empty it, clean it with a damp and soapy cloth, and then rinse it out. The drip tray can also be washed if you have a dishwasher, where it’ll fit best in the top rack.
You won’t need to run the cleaning cycle too often, but you should always do so after brewing any sticky drinks, like hot chocolate or sweeter coffees. Just run a brewing cycle with plain hot water, and this will stop sugar from crystalizing in the machine.
If you need to store your Keurig or you don’t use it for more than a week, then you should drain your Keurig just before reusing it again.
Keurig Auto-Brew and Auto-On

There are two types of modes for automatic brewing. The first is auto-brew. This mode allows you to program your Keurig coffee machine (filled with water) to brew your desired coffee pod at a specified time.
Simply select the ‘auto brew’ option on the display, or the auto brew button, and you can decide when you want the coffee to start brewing.
The auto-on mode, on the other hand, simply lets you set a time for the machine to start preheating.
How Will I Know Which Keurig Is Right For Me?
There’s a wide variety of Keurig models on the market. Honestly, it’s really comes down to personal preference.
There’s a few questions to ask yourself when looking into buying a Keurig that can help:
- Do I need one of the more complex models, or will a simple one suit me just fine?
- Is there enough counter top space in my kitchen for one of the bigger models?
- How much money am I willing to spend on one of these?
Of course, it’s possible that none of the Keurig models will feel like the right fit. If this is the case, you may want to consider…
Alternatives To Keurig
A lot of the pod style coffee machines on the market are worth looking into, and you can even use an assortment of K cups with some of them.
Nespresso Vertuo
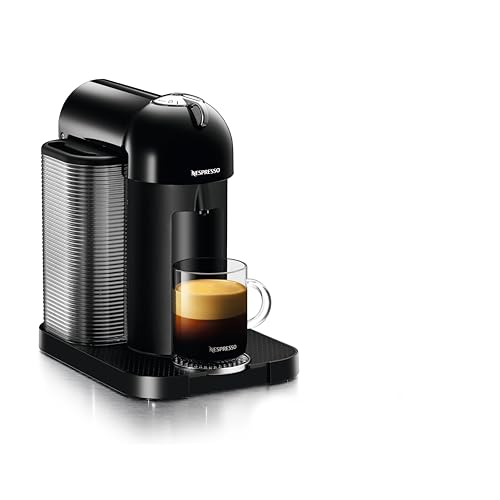
The Vertuo is ideal for both high quality espresso and regular coffee. This machine takes less than 30 seconds to preheat, and there are 5 cup sizes to choose from, the biggest being 14 ounces.
The taste of Vertuo coffee is considered among the best on the pod coffee market. The only real downside to this machine is that due to its specially designed barcode technology, you’ll only be able to use Nespresso pods.
For a more in-depth comparison between Keurig and Nespresso, check out this full article.
- SINGLE SERVE COFFEE & ESPRESSO MACHINE: Single serve coffee or espresso at the touch of a button....
- COFFEE FOR EVERY OCCASION: Brew better coffee at home with Nespresso's coffee espresso machine!...
- VERSATILE COFFEE MAKER: Brew 4 different cup sizes at the touch of a button (5oz & 8oz coffee,...
Last update on 2026-05-19
Sboly Single Serve Coffee Maker
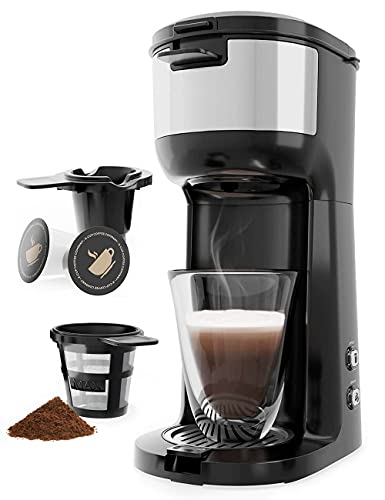
The Sboly coffee maker has both a low price and a simple design. Not only is it compatible with every kind of K cup on the market, you can also use your own ground coffee if you wish.
The brewing process takes three minutes overall, and it’s a very low maintenance machine. The main drawback of the Sboly is that, because of its size, you’ll need to refill the water tank between each coffee.
- Rapid Brewed Coffee Right At Your Fingertips: This personal single serve coffee maker will give you...
- Brew With Strength Control : This small single serve coffee machine displays measurements from 6 oz...
- Fast Brewing and Self-cleaning : Want to drink hot coffee within 3 mins? Just simply add water to...
Last update on 2026-05-19
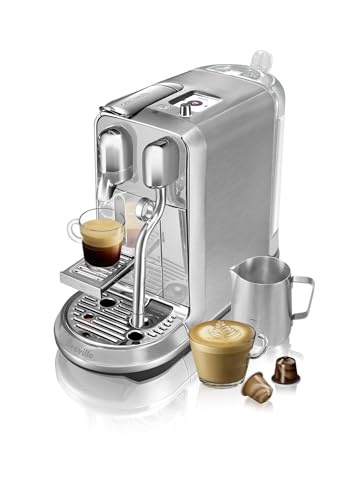
Breville-Nespresso USA Creatista

A particularly attractive coffee maker, the Breville-Nespresso USA Creatista makes delicious espressos and offers a myriad of options to brew your coffee just the way you like it.
The cleansing brew process is also completely automated, and can be completed with just a touch of a button. It’s pricier than alternatives, but it’s built to last.
- Barista Style: Creates 8 barista-quality espresso and milk recipes at the touch of a button
- Fully automatic steam wand offers 3 levels of milk temperature and fast adjustments for flat whites,...
- Eco-mode for low energy consumption after 3 minutes and an automatic energy-saving function switches...
Last update on 2026-05-19
For a more in-depth discussion, check out our full Nespresso Creatista Plus review.
Should I Get A Milk Frother?
When considering the purchase of a Keurig coffee maker, your mind might also go to milk frothers. Maybe to make espresso like beverages with your coffee. But do you really need one? There’s pros and cons. Let’s take a look…
Pros Of Having A Milk Frother
Easy to use: Most milk frothers are very easy to use, even if you’ve never used one before. It’s a very quick process too. Your milk will be nice and foamy within around 30 seconds. Most machines allow you to heat up the milk, too, which is a bonus.
Feel like a barista: Milk frothers also offer you the base to start creating coffee art. This process might be a few steps trickier than just pushing a couple buttons, but it’s a start!
High quality froth: There’s a few ways to achieve foamy milk, but this is by far the best. This is no surprise – it’s designed for it!
Cons Of Having A Milk Frother
Can be time consuming to clean: The only real downside worth mentioning is that for most milk frothers, you’ll have to clean them by hand (often with a brush), because they’re electronic and can’t be immersed in water.
Frequently Asked Questions Regarding Keurig And Other Coffee Makers
Are the K Cup pods recyclable?
Unfortunately the pods designed for Keurig machines are not recyclable, but there are plenty of reusable K cup filters.
Can I brew iced coffee with my Keurig?
Yep! A lot of the K cup pods that Keurig has to offer are designed with ice in mind – but ultimately you can brew whatever you want into a cup of ice.
What kind of water should I use with my Keurig?
Unlike certain other coffee makers that don’t recommend this, the Keurig is designed to be usable with plain tap water. This is the ideal option for brewing, unless you live in a region where drinking water from the tap is not recommended.
You can also use filtered water or distilled water, but it is not recommended that you use mineral water, nor softened water.
How Do I Get Replacement Parts For My Keurig?
Simply browse all Keurig replacement parts on the accessories page of the Keurig official website. These include reusable coffee filters, water filter cartridge refills packs, water filter kits, drip trays, water reservoirs, and mesh filters.
You can also buy accessories here (but the name of the page probably gave that away), including rolling storage drawers for your coffee pods, cork sleeve glass mugs, travel mugs, tumblers, ceramic mugs, milk frothing machines, and carafes.
What’s the difference between pod style coffee and ground coffee?
Far older than the more modern pod style, ground coffee is coffee in its traditional form. It’s coffee that’s been ground down to a powder, and is designed for quick brewing – but it’s not instant coffee.
If you’re grinding coffee yourself, it’s up to you how fine or coarse you want to make it. Pod coffee, on the other hand, works in the same way that teabags work. You just take it out of the pack, brew it until it’s ready to drink, and then the pod is done.
If you’re tempted to try coffee pods before buying a coffee maker, you can buy some and simply cut the foil lid with a knife, empty the pod into a mug, and fill the cup with hot water.
It’ll take just a few seconds to brew. You may not have even thought about doing this, but it’s a quick and easy way to try a variety of different coffee flavors so you can work out your coffee palate before buying a Keurig, or similar coffee maker.
Final Thoughts: How To Use A Keurig
Keurig coffee machines are an ideal choice if you’re looking to buy a pod style coffee maker. So long as you’re prepared to maintain it properly (and there’s not a whole lot of maintenance required), it should be brewing you high quality coffee for years.
The most important thing to remember when brewing coffee with your Keurig is to use a mug that’s the right size for your machine (too small will lead to spillage and coffee stains), run some vinegar solution through it every few months (avoid mineral deposits), and make it your life’s mission to try out every K cup flavor there is (because there’s just so many to taste)!
Coffee Has Never Read This Good!
Sign up for a FREE newsletter to the best home brewing tips and guides
Thank you for subscribing to The Cup Coffee House Crew! There's a surprise in your Inbox 🙂
Something went wrong.
- About the Author
- Latest Posts

“Jules” is a pharmacist by day and investor, writer, and health nut by night. When he’s not sipping on some coffee laced with MCT oil during an 18 hour fast, he is writing about how to get your coffee grind on or playing Monopoly with his 2 boys and wife. Ahh…life is good!